Well for decades we're talking wether to take our EXUP's off our FZR's and YZF's, it DOES create some extra maintenance hassles, doesn't it?. Well, think again.... since YAMAHA's patent expired, ALL the major hypersports bikes installed an EXUP (allthough they call it something else) Look at the GIXXERS and BLADES yessuh! all equiped with the praised and hated Powervalve in the exhaust system.
Told ya allready on the front page I suspected the EXUP the valve should be taken care of each service, lucrication and adjustment. Even though te manual soesn't say so!!
I might have been neglecting my baby the last couple of months, so I'll do the oil change as well.
First, take the bike on the paddock stand or put a steel rod or big screwdriver into the right side of the swing-axle, let the rod rest on a car-axle stand, slightly tilted to the right.
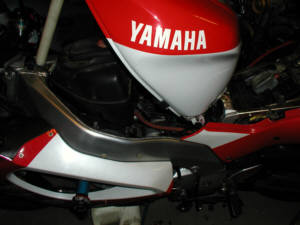
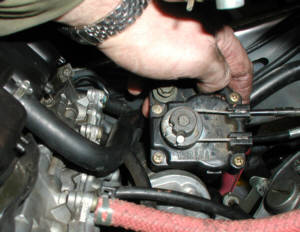
take off the belly pan and seat, then undo the front screws on both sides of the rear side pannels (the plastics that run under the seats, these have studs that should be puled out of the fuel tank, in order to flip the tank up (see pic)
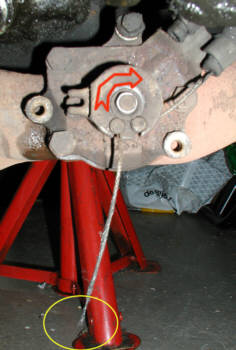
The cover of the EXUP is under the engine left side, the bulging on the exhaust is the cover, it can be taken off with a small ratchet (8mm) no need to take off the side stand (as described in the manual)
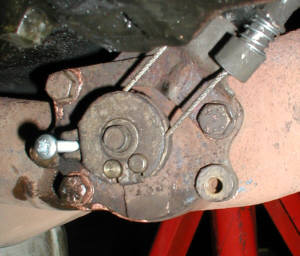
Revealing a broken cable (yellow circle on pic left)
The valve is in closed position, no way you can develop serious power this way. Rotation in OPEN position is illustrated by RED ARROW.
Don't wait for the tach to indicate EXUP Problems, the rattling of the valve (to much slack in the cables) will wear the cables down in no time.
Now it's time to remove the pulley (8mm) and the cover plate (10 mm) If you never serviced the exup before, this can take some serious treatment with penetrating oil.
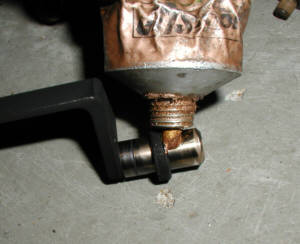
Now you can pull the valve out, don't loose the washer and spring, or the spacer (right side of the valve as seen on the pic-->) .
Cover the pivot studs with some copper grease
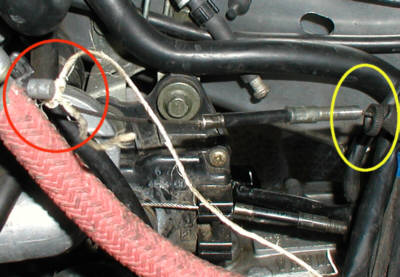
Special trick (pic on the left) Undo the damaged cable from the EXUP servo underneath the tank, undo the adjustment nut ALL THE WAY (yellow circle) and tie a string on the loose exup cable (red circle)
the nut has to be loosened so it passes easy through the gap between swingarm and engine.
Now it's time to pull the damaged cable out from underneath.......
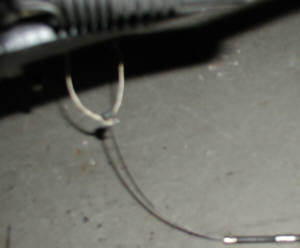
The fuzzy pic on the right shows the string attached to the new cable, the same thing applies, loosen the adjuster nut
Now, pull the string to get the new cable back in place. nifty huh?
If you have BIG HANDS
loosen the EXUP servo to gain acces to the pulley to get the cable back in place (pic left)
When the cables are back in place, (EXUP servo too of course) it's time to adjust. START
with turning the exup pulley, aligning the adjustment fork on the pulley with the hole in the cover. Lock it in place with a 4 mm screw or drill bit. Turn the ignition to the ON position. This sets the Servo in the adjustment position. (pic on the right)
Turn the Exup cables 'till they're snug, now release them half a turn and secure them with the locking nuts. Don't forget to remove the screw or drill bit!
Done!!
Thunderace, international community for owners and fans of the Yamaha YZF 1000 R Thunderace Yamaha YZF 1000 R Thunderace Motorcycle race maintenance tips chain chain oiler clubs trackdays